Showing posts with label Desserts. Show all posts

Thursday, October 4, 2012

Chocolate Zucchini Bread (Healthy!)

I went to the grocery store a few days ago and you wouldn't believe the produce section.  It seems to have been victim to a hostile zucchini takeover!  Every nook and every cranny was crammed with zucchini after zucchini! Literally there were even some on the floor has they had spilled off the table and seemed to be advancing from the produce section to the bakery to claim that as their own as well!


Despite their clear mission for world dominance I decided to buy some of the zucchini and see what I could make with them.  My first stop... chocolate zucchini bread!  I have loved chocolate zucchini bread since I was a kid.  Nothing better than a piece of chocolate bread for breakfast.  I search through some recipe books and online and everything I found sounded delicious but was packed with sugar and oil.  Not my idea of a healthy breakfast.  So I went about editing the recipe to make something that I wouldn't feel like was equivalent to a rich desert!


Chocolate Zucchini Bread Recipe


Ingredients
yields 2 loaves or 24 cupcakes
2/3 c. sugar
1/3 c. brown sugar
1/4 c. honey
2/3 c. unsweetened applesuace
3 eggs
1 T. vanilla extract
1/3 c. canola oil
1 1/2 c. all-purpose flour
1 c. cake flour
1/2 c. cocoa powder
1 t. salt
1 t. baking soda
1/4 t. baking powder
2 c. shredded zucchini
1 c. chocolate chips + 1 handful chocolate chips for topping (optional)

Directions
1) Preheat oven to 350 degrees and grease two loaf pans or 2-12 cup muffin tins.

2) Combine the sugars, honey, applesauce, eggs, oil, and vanilla in a bowl and whisk together until well combined.

3) Add the flours, cocoa powder, salt, baking soda, and baking powder to the mixture and stir until there are very few clumps.

4) Fold in the shredded zucchini and the chocolate chips.

5) Divide the batter evenly between 2 loaf pans or 2-12 cup muffin tins.  (or one of each!).  Sprinkle the tops  of the batter with a handful or so of chocolate chips for extra chocolatelyness.

6) Bake at 350 (muffins for 16-18 minutes or loaves for 30-45 minutes).  Check for doneness by inserting a small toothpick into the center.  When the toothpick comes out with just small crumbs attached you are done.  (Note that if it comes out covered in only melted chocolate and no better that means it is done too... and also that you stabbed a chocolate chip... how rude!).

If you love quick breads then check out my peanut butter cup banana bread .  Less healthy... but very delicious ;)

Peanut Butter Cup Banana Bread

.

Sunday, August 12, 2012

Popovers

This post is a special favor to one of my favorite readers.  She asked me to make her chocolate, cherry popovers.  After spending a boring afternoon at work browsing pinterest she had the idea to make chocolate, cherry popover but search after search after search lead her to... no recipes!  What is worse than that!?  So she asked me to make them and post a recipe so she would never be in that spot again.  And thus... chocolate cherry popovers.


You can make these without the chocolate and cherry if you want.  Substitute cinnamon and sugar and pecans or maybe some fresh raspberries and whipped cream... even just plain with powdered sugar is a fantastic breakfast or at the very least a breakfast side dish.


Popovers should be eaten warm right from the oven. Timing is important when you're serving these so be sure you have your other dishes on a schedule that will allow these to be served straight from the oven.


If you're like my friend and love pinterest and delicious food then follow me on pinterest so see all my recipes and posts! :)  Follow Me.

Chocolate Cherry Popover Recipe


Ingredients
yields 12 popovers
1 cup flour
1/4 t. salt
1 cup whole milk
2 large eggs
1 T. butter, melted and cooled to room temperature
2 T. sugar
1/2 t. almond extract
2/3 cup cherry preserves
1/2 cup chocolate chips

Directions
1) Place an empty muffin tin in the oven and set to preheat to 450 degrees.  Do not spray the muffin tin.

2) In a medium sized mixing bowl whisk together the butter** and milk.  Whisk in both eggs and the almond extract.
**Be sure the butter has been allowed to cool to room temperature or else it will seize up in the milk.  If it does seize then heat the butter and milk mixture in a sauce pan over low heat until the butter melts again and allow the milk to cool to room temperature before adding the eggs.

3) Whisk the flour, sugar, and salt into the bowl with the liquid ingredients until just blended, a few lumps are okay.

4) Remove the hot pan from the oven and quickly spray the interior of each cup as well as the top rim of the pan with cooking spray.  Distribute the batter evenly into each of the 12 cups filling each one up about 1/2 way with batter.

5) Bake the popovers in the 450 degree oven for 30 minutes *without opening the door*.  Seriously, leave it closed.  I know you want to peak but don't.  Turn on the light if you must but don't open that door!  The popovers "pop" due to steam in the batter and opening the door helps that steam to escape.

6) Turn the heat down to 350 degrees and continue to bake for an addition 12-15 minutes or until the popovers become a golden brown color on the outside.

7) Quickly slice the popovers in half and fill the hole in the middle with the cherry preserves and drizzle with melted chocolate.  The perfect brunch dessert! :)

Tuesday, July 24, 2012

Raspberry Sorbet

Nothing beats the summer heat like a frosty bowl of ice cream!  Apparently I am not the only one that thinks this way in Arlington though.  The hot weather lead me right to the grocery store for a pint of sorbet when lo and behold... they were out.  Like completely out.  Like no ice cream out.  WHAT?!  Okay, to be fair they did have two sad pints in the back corner... but they were sugar free... yikes!! The horror!!! Where did all the real stuff go?! No matter, I will make my own!  And thus this super simple raspberry sorbet was born.  No need for Haagen Dazs with this recipe in your back pocket.


This was delicious.  I have always been a big fan of the light, tart flavors of sorbet.  No better way to enjoy a summer night than with a bowl of sorbet and a spoon.  Without a plan in mind I wander over to the produce section to see what I could find.  There were raspberries everywhere and better yet they were all on sale!  And that is the story of how fate picked my sorbet flavor :)


This recipe is super simple and easy.  You can easily toss this together while you get dinner ready and have a fantastic fresh dessert ready when you're done.  Substitute the raspberries for strawberries, blueberries, or blackberries if you like.  Better yet toss them all in for a quadruple berry blast!


Raspberry Sorbet Recipe


Ingredients
yields about 1 pint
1 cup water
1 cup sugar
4 cups fresh (or frozen and defrosted) raspberries
2 T. fresh orange juice
1 T. orange zest

Directions
1) In a sauce pan combine the sugar and water and whisk to dissolve.  Over medium heat bring the mixture to a simmer.  

2) Add in the raspberries and bring the mixture back to a simmer.  Allow the mixture to simmer for 4-5 minutes or until the raspberries break down.

3) Remove the mixture from heat and allow to cool for 5 minutes.  Pass the mixture through a strainer or mesh sieve if you prefer a seedless mixture.  For me this was easiest to pour the mixture into a sieve in batches and use a rubber spatula to push the mixture through.  Don't worry, it won't take long and it's worth your time to have a smooth, creamy sorbet.

4) Place the mixture in an ice cream maker and follow the manufacture's instructions.  When the ice cream is finished place in an airtight container and store for up to 10 days.

Saturday, June 23, 2012

Strawberry Cream Cake

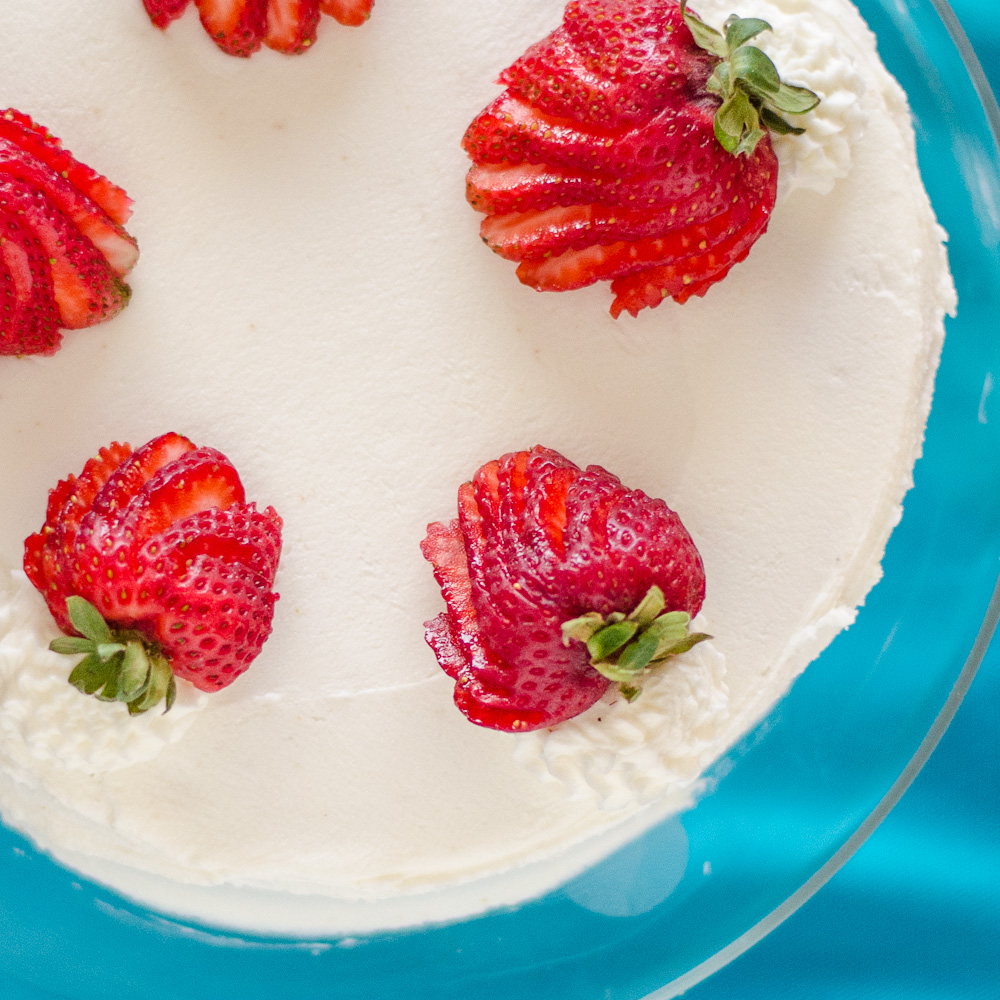
I am loving all the strawberries available right now.  I currently consider a meal that doesn't include strawberries to be incomplete.  So when I found out it was a co-worker's birthday this week and his favorite childhood cake was strawberry I new I had to try one.  This cake starts out like any other vanilla cake but instead of milk, crushed strawberries are mixed in to make a fruity, moist cake.


You'll see that I frosted the cake with a white icing.  My coworker likes sweet icing so I used my Little Debbie Cream Filling recipe.  While this was tasty I also made a strawberry glaze that I put on a cupcake I made to test the cake.  The glaze is definitely the winner if you like a lighter and less sweet cake.  Otherwise slather on that Cream Filling! :)


If you decide to ice the cake be prepared to do a full crumb coat and allow it to firm up in the fridge before your final frosting.  This cake is just a little crumby (not crummy!) so you will definitely need a crumb coat to get a presentable finished product.  I spent quite a bit of time icing this cake and adding the sliced strawberries on the top; I was actually really proud of my cake!  However, on the way to work Washington, DC traffic struck and an extremely rude man cut me off causing me to slam on my brakes.  The cake flew to the floor and smashed against the side of its carrying case.... :'(


After a bit of reconstructive surgery I was able to at least put the cake back together and arrange the strawberries but it was still an ugly mess.  Oh well, at least I took the pictures before I left for work!  Note of caution if you're transporting this... watch out for a middle aged balding guy in a late 90s blue BMW with DC plates!

Strawberry Cake Recipe


Ingredients
yields 2 8-inch rounds
2 cups cake flour
1/4 t. salt
1 T. baking powder
1/2 cup (1 stick) butter, softened
1 1/3 c. sugar
2 large eggs, room temperature
2 t. vanilla extract
8 oz. (half a container) strawberries (if using frozen be sure to defrost completely)
*optional* a few drops of red food coloring to get more of a color pop than my cake had

Directions
1) Preheat oven to 350 degrees and grease and flour 2 8-inch round cake pans (yes, do both... you'll thank yourself when you go to remove the cakes!).

2) Sift together the flour, salt, and baking powder and set aside.

3) Mix together the butter and sugar until combined (no need to cream it, just mix it until the sugar and butter are evenly distributed in the mixture... if you mix too long you can get a cake with holes in it).  After the sugar and butter are mixed together add the eggs and vanilla and beat with a whisk until well combined.

4) Pour the wet ingredients into the dry ingredients and stir until there are just a few small lumps.  The batter will be stiff compared to many cake batters, that's okay... the strawberries will loosen it up.

5) Wash the strawberries and remove their green tops.  Using a potato masher or fork mash the strawberries.  This should yield about 3/4 cup of mashed strawberries and strawberry juice.  If you are a little short toss in a few more strawberries.  Pour the crushed strawberries, juices and all, into the cake batter and stir until evenly distributed.

6) Pour the batter evenly into the two pans and use a knife or spatula to spread the batter evenly in the pans. Bake at 350 for 20-25 minutes or until a cake tester comes out with just a few small crumbs attached.

7) Allow to cool completely and frost with either a strawberry glaze (recipe below) or a vanilla icing like my Little Debbie Cream Filling recipe.

Strawberry Glaze Recipe


Ingredients
1 c. powdered sugar
1/2 c. mashed strawberries
1 t. orange zest
2 T. milk (I prefer whole but you can use whatever you have)

Directions
Whisk together all ingredients and pour on top of the cool cake.

Tuesday, June 19, 2012

Strawberry Rhubarb Pie

Well this weekend officially felt like summer here in Arlington.  The weather was great, the sun was shiny, and there was finally some rhubarb available in the grocery!  I have been on a rhubarb hunt for nearly a month now.  Store after store I ventured into and still nothing.  I called places; I went to farmer's markets; I even asked a store to call me if they got some.  All to no avail.  Everyone was out or just had some last week, maybe check back later! *sigh* You would have thought I was hunting down Justin Bieber tickets it was so tough to find!  But lo and behold last week while I was running errands I found some rhubarb.  Just sitting there in the back of the store tossed into an old bin.  I bought it all! :)  And I made this delicious pie...


Strawberry rhubarb pie was always a summer tradition in my house.  Growing up my mom kept rhubarb plants behind the house and would pick it and made delicious pies, jams, tarts, and cobblers with it.  I know understand why she kept the plants... it probably saved her 8 hours of hunting it down at grocery stores!  I have always loved rhubarb and its funny celery like look.  Its slightly sour taste and soft texture after being cooked are amazing.  Mix with strawberries, like in this pie, and you have a dynamite dessert!


I actually made a big pie (for my brother) and two little pies (for Nick and I).  If you like the look of the little pies you can follow the recipe below using tart rings to make the smaller pies.  Everything else will be the same but these only bake for 15-20 minutes

Strawberry Rhubarb Pie Recipe


Ingredients
yields 1 pie
1.5 lbs rhubarb, cleaned
1 16oz package strawberries
3/4 cup sugar
3 T. cornstarch
1/4 t. salt
1 t. vanilla
1 batch double crust pie dough**
**see recipe below or purchase your favorite brand from the freezer section of your local grocery

Directions
1) Clean the rhubarb of all dirt and chop into small slices (about 1/4 inch thick).

2) Rinse the strawberries and remove their tops.  Slice the strawberries and set aside with the rhubarb in a large mixing bowl.

3) Stir together the sugar, cornstarch, and salt.

4) Combine the strawberries and rhubarb with the sugar mixture until all pieces are evenly coated.  Sprinkle the vanilla extract over to the top.  Place the mixture on the counter to rest for about an hour.

5) Pre-heat the oven to 375 degrees.

6) Roll out the pie dough into two 9-inch rounds (be approximate here, no one will notice if they were a little bigger on one side).

7) Gently place one round in a pie dish; no need to grease the pie dish here as the dough contains so much butter it shouldn't stick.

8) Cut the second pie crust into 10 evenly sized strips (a pizza roller works great here).

9) Pour the strawberry-rhubarb mixture into the pie crust and arrange the 10 strips over the top in a lattice structure.  Crimp the edges of the crust together.  Brush the crust and lattice with a little bit of melted butter (so that it browns nicely).  If you have never done a lattice weave before I like this tutorial from Annie's Eats.

10) Place the pie in the pre-heated oven and bake for 30-40 minutes or until the top is browned and the filling has set.

Pie Dough Recipe


Ingredients
yields 1 double crust
2/3 cup butter, cold
2 T. vegetable shortening
1 t. salt
2 cups all-purpose flour
4-5 T. very cold water (add a few ice cubes while it is sitting on the counter, just be sure not to add them to the pie)

1) If you have a food processor place the butter, shortening, flour, and salt into the food processor and process until the dough is the is size of small peas.  Slowly drizzle in the water while pulse processing until the dough begins to come together in large chunks.  The exact amount of water will depend on the age of your flour (older takes more water) and the humidity where you are working (more humid takes less water).  You are looking for the dough to just come together into large clumps without getting sticky.

1b) If you don't have a food processor combine the butter, flour, lard, and salt in a large mixing bowl and use a pastry cutter or fork to mash the butter and lard into the flour.  When the mixture becomes the size of peas slowly add one tablespoon of water at a time to the dough until it begins to come together.  You can work with your hands at this point but be careful not to knead the dough or overwork it or your pie will become chewy instead of flaky.

2) When the dough is finished wrap it in plastic wrap and place it in the refrigerator for about an hour to chill.

3) When the dough has chilled remove it from the plastic wrap and separate it into two pieces. One for the bottom crust and one for the top.  Roll out each to 1/8-1/4 inch thickness.  Follow the instructions in your recipe for baking the pie.


Sunday, May 20, 2012

Mexican Wedding Cakes

These little cookies are the perfect tea snack.  Call them Mexican Wedding Cakes, Russian Tea Cakes, or Butterballs, regardless they are delicious!  These cookies have a shortbread-like texture and are made with ground pecans (or almonds) then are rolled in powdered sugar.


I think the reason I like these cookies so much is because they aren't very sweet.  The powdered sugar on the outside provides a bit of sweetness, but compared to many other cookies these are actually quite tame.  


On a completely un-cookie related note, it has been a fun week here in Arlington.  If you saw my last post you know that my Nutella was featured in the Huffington Post's Kitchen Daily section which was such an honor.  While this was very exciting it actually created a lot of work for me... you see just about everyone I know now wants me to make Nutella for them!  So my food processor definitely will be running in over drive.  Just in case you aren't nearby and I can't personally make you Nutella you can try it out for yourself by following this simple recipe here: Homemade Nutella Recipe.


Back to the cookie at hand!  These are simple to make and keep quite well in an airtight container.  They are nice options for brunch, snacks, or tea because of the limited sweetness.  Just be sure to have napkins on hand as they can be a little messy with all the loose powdered sugar!

Ingredients
yields 2 dozen cookies
1 cup butter, softened
1/3 cup sugar
2 cups flour
1 t. vanilla
1 cup pecans (or almonds)
1/4 t. salt 
1/3 cup powdered sugar

Directions
1) Pre-heat oven to 350 degrees.

2) Cream butter and sugar together.  Creaming the butter and sugar means whipping them together until they become light and fluffy; it usually takes 2-3 minutes.  This helps the cookies to rise without having to add a leavening agent.

3) Grind the pecans in a food processor until finely ground.

4) Add the flour, vanilla, pecans, and salt (everything except the powdered sugar).

5) Roll dough into small balls and place on a greased cookie sheet about 1 inch apart.  They should be roughly the size of golf balls.  You can make them larger or smaller as you like.

6) Bake 8 minutes. Remove from oven and allow to cool then roll them in the powdered sugar.

Thursday, April 26, 2012

The Perfect Chocolate Chip Cookies

Who doesn't love a warm, gooey, buttery chocolate chip cookie?  They make you feel better on a bummer of a day; they help you celebrate a good day; they make a mediocre day more delicious... While they may not be your favorite cookie they are probably your most remembered cookie.  Whether it was an after school snack, a lunch box treat, or the snack after a losing soccer game (my team always lost!) these were there to be munched on.


These cookies are a recipe my mom gave me when I moved out.  I believe the recipe was my Great Aunt Marcia's recipe and must have usually been made for a village as the original instructions would make about 8 dozen cookies!  Well over the years my mom sized it down (and then back up when my brothers became hungry teenagers). In our house there were always cookies of various sorts but the one that was always available was the chocolate chip cookie.  My mom would make a huge batch and freeze the dough in balls in a plastic bag.  Anytime we needed a cookie we were just a pre-heated oven and 10 minutes away from warm, chocolaty deliciousness.  That is if my brothers didn't eat them all first of course!


I made these cookies all through college; even when I lived an a house without an oven I would make the batter sans eggs and we would all sit in my room, watch Friends re-runs and eat the dough.  Now that I have a place with an appropriately sized kitchen I still make the full batch even for just Nick and I because I know I can freeze the dough balls and have fresh cookies anytime we need them be it for a bad day or surprise guests.  Everybody loves a girl that can have a warm batch of chocolate chip cookies ready in just 10 minutes. Best. Hostess. Ever.  :)  


I honestly believe this is the best recipe for chocolate chip cookies.  It makes giant cookies that hold their shape even through baking.  No flat boring cookies here.  These are crispy on the outside and chewy on the inside which to me is the best of both worlds!  The trick to their shape is using an ice cream scoop to place the dough on the cookie sheet.

The Best Chocolate Chip Cookie Recipe

Ingredients
yields 18-36 cookies depending on the size of your scooper
1 lb (4 sticks) butter, softened
1 cup brown sugar, packed
2 cups sugar
2 eggs
1 T. vanilla
1 t. baking soda
5 cups flour
1 t. salt
2 cup chocolate chips

Directions
1) Pre-heat oven to 350 degrees.  Cream butter and sugars together until fluffy (in a stand mixer this takes about 2 minutes).  Add the egg and vanilla and mix until incorporated.

2) Add the salt, baking soda, and flour and stir until combined.  Fold in the chocolate chips.

3) Using an ice-cream scoop place the cookies on a greased cookie sheet with a few inches of space in between.  Bake at 350 degrees for 10-12 minutes or until the edges start to brown.

*If you have leftovers and want to freeze them take the ice cream scoop and scoop them onto a greased cookie tray and place it in the freezer (you don't have to leave much room between them as they aren't cooking).  After about 20 minutes they will be solid enough to remove from the sheet.  Place in an airtight container with wax paper between each layer.  When you are ready to bake them remove them from the freezer, place back on a cookie sheet and pop directly into a pre-heated oven (350 degrees).  No need to defrost.  Add an extra 3-4 minutes to the baking time.

Sunday, April 22, 2012

Boston Cream Pie

Back to the sweets and what better way to do it than with this fantastic Boston Cream Pie Recipe.  The cake is just delicious and with the vanilla filling inside and the chocolate icing on top this dessert is one of my favorite easy cakes.  I am a *terrible* froster.  So this cake was perfect.  Frosting the cake just means pouring chocolate on top... :)


My biggest problem with this cake is it is *not* easy to take pictures of! When you have a cake with a yummy, gooey filling you want to show that.  You want a big thick layer of that delicious vanilla goo to be poking out between each slice of cake.  The problem was when I placed the cake layer on top it smashed the pastry cream so that only a small layer was visible.  The hardest part of this blog for me is the photography and the staging. With a whisk and an apron I feel like a pro; but with a camera and a tripod I often feel like a dunce.  Just because food tastes yummy does not mean it makes a great picture. It takes a lot of work to try and get the food that I made to look pretty enough for other people to want to make.  What was I to do about the pictures for this cake?!


After much thought and a lot of failed attempts I finally came up with this little trick.  By putting a small, thin dessert plate in the middle of the cake I was able to add the pastry cream around the edges and allow the second layer of cake to rest on top of the plate.  This kept the filling from squishy out for the pictures!  Just be sure to remove the little plate before serving and leave some pastry cream aside to fill in the middle.

So please enjoy the photos below for the cream-filled cake staging tutorial photos below!


And... ta-da!  A cake with a lovely layer of vanilla pastry cream.  Now just because it didn't sit as well for pictures doesn't mean this cake has trouble staying together for serving.  I don't want you to be afraid you'll have to have a plate in the middle of your cake at a party!  The cake was perfectly fine without being staged - just I wanted some very close up pictures that featured the ooey-gooeyness of this cream.  You know honestly I was lucky there was any cream left to fill the cake.  I made the cream a day ahead of time and found myself snacking on it more than a couple of times!  Yum!

Boston Cream Pie Recipe


Yellow Cake Recipe

or

1-2-3-4 Cake Recipe

Ingredients
yields 2 cake layers
1 cup milk
2 cups sugar
3 cups cake flour
4 eggs
2 sticks of butter, room temperature
1 t. baking powder
1/2 t. salt
1 t. vanilla

Directions
1) Pre-heat the oven to 350 degrees.  Grease and flour 2 cake pans.  Don't skip the flouring step or you will be unhappy as you are attempt to un-stick a cake from a pan.

2) Cream the butter and sugar until well mixed but not fluffy.  This should only take about 30 seconds to a minute.  Slowly add the eggs in one a time and then the vanilla.

3) Sift together the flour, baking powder, and salt.

4) Add 1/3 of the flour mixture to the butter mixture and stir.  Add 1/2 the milk to the mixture and stir.  Add an additional 1/3 of the flour mixture and stir.  The last of the milk, stir.  Finally fold in the last of the flour.  It is important to add each of these a bit at a time like this in order to get the ingredients incorporated fully and to avoid "tunnels" in the cake.

5) Pour the batter into the greased and floured pans.  Use a spatula to spread the batter evenly within the pan.  Bake 25-30 minutes or until a cake tester inserted in the middle comes out with just a few small crumbs.
**The cake is called 1, 2, 3, 4 cake due to the ratio of ingredients.

Pastry Cream Recipe

**for more details check out my original pastry cream recipe here

Ingredients
yields about 2 cups of pastry cream
2 cups whole milk
4 large egg yolks
1/2 cup sugar
3 1/2 T. cornstarch
1/4 t. salt
2 t. vanilla extract

Directions
1) Heat the milk and 1/4 cup of the sugar in a sauce pan over medium high heat.

2) Whisk together the egg yolks and remaining 1/4 cup of sugar until the egg yolks become pale in color.  Slowly add in cornstarch whisking the entire time.

3) Temper the egg yolk mixture by slowly pouring 1/4 cup of the hot milk mixture into the egg yolks while whisking. Continue whisking and add an additional 1/4 cup of the hot milk.

4) Pour the egg yolk mixture into the sauce pan with the remaining milk and whisk continuously over medium heat until the mixture thickens and starts to bubble. Add in the vanilla and salt, stir, and remove from heat.

5) Pass through a fine mesh strainer or sieve into a glass or plastic bowl and cover with plastic wrap and refrigerate at least 2 hours but up to 7 days.

Chocolate Ganache Recipe

Ingredients
yields 1 cup ganache
2/3 cup chocolate chips
1/3 cup half and half

Directions
1) Heat the half and half until it begins to bubble.  Remove from heat and stir in the chocolate chips until completely melted.  You can save this in the refrigerator for up to a week.  Just reheat for 15-30 seconds until it reaches desired consistency.

Assembling the Boston Cream Cake...


Ingredients
yields 2 cakes - serves 16-32 depending on how greedy you are! :)
2 yellow cake layers (recipe below)
1 batch pastry cream (or 2 cups vanilla pudding if you don't want to make your own)
1 batch chocolate ganache (recipe below)

Directions
1) Cut each cake in half and fill each with 1/2 of the pastry cream (or vanilla pudding).
2) Pour the chocolate ganache on top of each cake a few minutes before serving.

Sunday, April 15, 2012

Chocolate Cream Swiss Roll

Have you ever heard of a recipe and instantly thought... I.MUST. MAKE. THAT!  Well this totally happened to me last week.  In class we learned to make roulades.  These are basically small thin sponge cakes that you layer with a tasty filling, roll up, and frost.  They are so much fun but as we made a vanilla, raspberry one in class I couldn't even concentrate because all I was thinking was... I can make Little Debbie Swiss Rolls now!  


That's right, the lunch box treat from grade school that everyone loved.  I can make them and better yet - I can make a GIANT one.  How much fun would it be to go to a party and have dessert be a giant Swiss Roll?!  I knew I would have to give this a try.  


The cake is a little fussy and takes some extra steps which is never my favorite way to lead into a recipe.  The technique, however, is critical.  These little cakes can crack easy turning your beautiful Swiss Roll into a heap of crumbs and icing is not desirable... for the record it would be a delicious heap of crumbs and icing... but still... not something Little Debbie would be proud of.  After doing some online research it seemed the best way to keep the cake from cracking was to wrap it in a tea towel quickly after it was removed from the oven to give it "memory".  I gave it a shot and it turned out delicious!


The icing took a couple of tries.  I wanted something sweet and fluffy but not overly buttery.  I settled for a variation of Nick's mom's whoopie pie filling and it was perfect.  Finally a little bit of chocolate ganache glaze and the cake was ready to be sent off to work with Nick for a morning meeting treat.  You will notice the pictures with the ganache being poured and while I want to take all the credit for being the multi-talented individual that I am... I have to give the credit to Nick.  I poured the chocolate while he took the pictures.  This required him getting out of bed super early to help and he was kind enough to keep the grumbling to a minimum... though I do believe the spoon of whoopie pie filling helped ;)  Either way it was pretty nice of him to help out!

Chocolate Sponge Cake (or Chocolate Jelly-Roll Cake) Recipe

Ingredients
yields 1 1/2 sheet pan sponge cake
1/4 cup dutch processed cocoa powder
1/3 cup cake flour
1/4 t. salt
1 t. baking powder
1/2 t. instant coffee
4 eggs, yolks and whites in separate bowls
1/2 cup sugar

Directions
1) Line a half-sheet pan first with cooking spray or vegetable shortening then with parchment paper across the bottom of the pan.  The cake sticks very easy so it is important to make sure the sheet is lined properly or you will end up with a torn cake.

2) Pre-heat the oven to 425 degree.

3) Sift together the dry ingredients (cocoa, flour, salt, baking powder, and coffee) and place in a small bowl to the side.

4) In a mixer with the whisk attachment whip the egg whites until they are at soft peaks.  This is also sometimes referred to as wet peaks.  You will know they are ready when you remove the whisk and the egg whites form a Dairy Queen ice cream cone like curl.  If they fall quickly and don't create the curl keep going... if they stand straight up in the air... I'm sorry... start over :(

5) In a small mixing bowl mix the egg yolks and sugar together until they become pale yellow.  Add the dry ingredients to the egg yolk mixture.  The batter will be stiff - don't worry it should be.

6) Mix in half the egg white mixture until completely incorporated and the batter becomes easier to work with.  Finally fold in the last half of the egg whites.  Don't over-stir the second half.

7) Pour onto the greased and parchment paper lined pan.  Use a spatula to spread the batter evenly so you do not end up with a big cake on one side and a cracker like cake on the other.  Because the egg whites were whipped it is important *not* to bang the pan in order to get the batter to settle.  Simply use a spatula to spread. Bake for 6-8 minutes or until the cake is sponge-y to the touch.

8) Remove cake from the oven and allow it to cool in the pan for a few minutes.  Tip the cake over, remove the cake, pull off the parchment paper, and roll up into a tea towel to cool.  This gives the cake form memory and will keep it from cracking after you have filled it with icing and roll it up.  Allow the cake to cool for 20 minutes.

9) After the cake has cooled spread the Little Debbie Creme Filling (recipe below) evenly across the entire cake.  Roll the cake up (remove the towel!!) like the pictures above.

10) Place the cake on a wire cooling rack set on top of the half sheet pan.  Pour the chocolate ganache glaze over the top of the cake and allow to cool.  If you are a big chocolate lover thten after the first layer of glaze has cooled go ahead and pour another on top for a thicker layer of icing.

Slice the cake to serve and pretend you are back in the 5th grade with the best lunch box treat there ever was! :)

Little Debbie Creme Filling Recipe

Ingredients
yields 1 batch
1 stick butter, softened
1/4 cup vegetable shortening
1 small (8oz) jar marshmallow creme
1 t. vanilla
1/4 t. salt
1 cup powdered sugar

Directions
1) Whip together the butter, shortening, creme, vanilla, and salt.  Slowly add the sugar.  If you are in a humid climate you may need to add up to an extra 1/4 cup powdered sugar to get the right texture.

Chocolate Ganache Glaze Recipe

Ingredients
yields 1 batch
1/2 cup heavy cream
4 oz (about 2/3 cup) dark or milk chocolate roughly chopped (or chocolate chips)

Directions
1) Heat the cream over medium heat until it begins to simmer.  Quickly remove from heat and pour in the chocolate.  Stir with a whisk until all chocolate has melted.

I've had a couple of questions about the pan.  I think the best pan to use is a Jelly Roll pan or a half sheet pan.  It is basically a cookie sheet with shallow sides.  I personally use the one below as my go-to pan for baking.  Nick's mom bought it for me as a gift when I was in pastry school and I love it :)

Thursday, March 29, 2012

Eclairs

Well to go along with the theme I have taken up lately I will continue with the pastry posts.  I assure you I do, upon occasion, eat meals, vegetables, fruits, and the like.  Usually this is only because I have run out of pastry, however.  Oh well - life is meant to be enjoyed!  These eclairs are actually something I made while in Florida visiting Nick's parents.  It just took me a while to get the post all ready.  I hope you don't mind the tardiness :)  Trust me, it will be worth the wait.  These were just perfect.  The filling was a perfectly sweetened rich and gooey vanilla cream, the chocolate topping was as delicious as it was shiny, and the pastry was crisp and buttery.  Seriously, I didn't know I could love eclairs so much until I had these!


These are technically salambos which are mini eclairs. I like to think of them as fun size.  Have a two or three... or ten!  Bite size is way more fun and you don't end up with pastry cream all over your fingers.  I did find out though that when you make things miniature boys eat them up rather quickly.  Nick and his cousins ate these the way a normal person would eat popcorn.  They popped one after the other in their mouths so quick they couldn't possibly have had time to chew!  I suppose that is how you know you are appreciated as a chef... when the serving plate is empty.

These are not terribly difficult to make and they are so appreciated as a breakfast or mid-afternoon treat.  You seem super fancy without having to work super hard which is my favorite way to be.  These little treats are just the right amount of sweetness and go perfectly with a morning coffee and an afternoon espresso.  The chocolate stays soft and a little sticky - just enough for good finger licking :)
To make eclairs you will first need to make a full batch of pâte à choux.  Instead of piping it into small circles the way you would for cream puffs you instead pipe it into a long strip.  Mine were about as long and wide as my thumb.  You bake the choux just as you normally would and allow it to cool.  After the choux is cool cut off the tops, fill with pastry cream, and dip each top in a bit of chocolate sauce and there you have it - most delicious breakfast ever.  Just be careful to set one aside for yourself before leaving them unattended in a room - there may be none left when you get back!

Ingredients
Makes about 24 mini eclairs
1 finished batch, cooled to room temperature, Pâte à Choux
**Instead of piping them into small circles you will pipe them into oval shapes about the length and width of your thumb.  Egg wash and bake as directed.
1 batch Pastry Cream (Recipe below)
1 batch Chocolate Sauce (Recipe below)


Directions
1) After you have completed the choux, pastry cream, and chocolate sauce you will assemble the salambo by carefully slicing each pastry length wise and removing the top.  Fill the center with pastry cream and dip the top into the chocolate sauce before placing back on top of the pastry.

Pastry Cream Recipe

2 cups whole milk
4 large egg yolks
1/2 cup sugar
3 1/2 T. cornstarch
1/4 t. salt
2 t. vanilla extract

Directions
1) Heat the milk and 1/4 cup of the sugar in a sauce pan over medium high heat.

2) Whisk together the egg yolks and remaining 1/4 cup of sugar until the egg yolks become pale in color (see picture above).  Slowly add in cornstarch 1 T. at a time while whisking.

3) Temper the egg yolk mixture to keep your eggs from scrambling.  This is done by slowly pouring 1/4 cup of the hot milk mixture into the egg yolks while whisking.  This brings up the temperature of the yolks so they can be added to the milk mixture.  Continue whisking and add an additional 1/4 cup of the hot milk.

4) Pour the egg yolk mixture into the sauce pan with the remaining milk and whisk continuously over medium heat until the mixture thickens and starts to bubble.  It should become the texture of pudding.  Add in the vanilla and salt, stir, and remove from heat.

5) Pass through a fine mesh strainer or sieve into a glass or plastic bowl and cover with plastic wrap  (the plastic wrap should lay directly on the top of the pastry cream to avoid forming a skin - you can spray the plastic wrap with cooking spray to avoid sticking) and refrigerate at least 2 hours but up to 7 days.


Chocolate Sauce Recipe

1/2 cup chocolate chips
1/4 cup heavy cream


Chocolate Sauce
1) To make the chocolate sauce heat the cream and chocolate chips over barely simmering water stirring as necessary.  Alternatively you can melt them together in the microwave at a medium setting stirring after each 30 second increment until fully melted

Hope you enjoy them!

Monday, March 26, 2012

Classic Chocolate Brownies

I may have gone completely insane this weekend.  That's right.  Totally, utterly, and completely mad.  Do you want to know what I did this weekend.  I took, no joke, over 300 pictures of brownies this weekend.  That's right OVER 300 pictures of just one plate of brownies.  I believe this was the first weekend I spent more time with my camera in my hand than whisk and a bowl.

Taking pictures is tough business.  There are too many buttons, too many settings, and too much to remember!  Not to mention lighting.  Lighting may very well be the end of me.  Seriously, how can lighting be so difficult?!  Natural light? Reflected light? Softened light?  There are too many combinations.  So after hours of changing my location, light source, and camera settings I was up to 300 pictures!  Was it all worth it?  Well, you tell me... I think the pictures are better than before and hopefully you will too!

I know what you're thinking... how long did this clearly crazy girl spend with her camera in hand?  About 5  hours.  Seriously, 5 hours.  That is why in the first picture about you can see one of the brownies is missing a bite.  It was a long time to not eat them, don't judge... they smelled great!  Honestly, who can resist brownies after looking at them for 5 straight hours?!  Okay, okay so I ate probably 6 of them before I even started.  You caught me.  Eating is so much better than picture taking! :)


Other than picture taking this weekend was devoted to brownie research.  It is tough to find just the right recipe that balances chewy with fudgy and fluffy with dense.  I knew I wanted both chocolate and cocoa powder.  The chocolate because who doesn't want that?!  And the cocoa powder because my parents recently went on a trip to Switzerland and brought me back some fantastic cocoa powder.  I would have preferred to been taken on the trip with them - but I suppose I will have to settle for pictures and sweets.  Life could be worse.  After lots of recipe research I decided on a combining three of the top recipes (one for fudge brownies, one for chewy brownies, and one for brownie cake) to arrive at these delicious treats!  Hope you like them :)

Ingredients
yields 16 small or 9 greedy-sized brownies
6 T. bittersweet chocolate
6 T. unsalted butter
1/4 cup dutch-processed (or alkalized unsweetened) cocoa powder 
3 large eggs, room temperature
1 cup sugar
1/2 t. salt
2 t. vanilla extract
3/4 cup all-purpose flour
1/2 t. baking powder
1/2 cup walnuts, pecans, or both (optional)
1/4 cup powdered sugar (optional)
Directions

1) Preheat oven to 325 degrees.  Line a square 9-inch baking pan with foil and spray foil thoroughly with non-stick cooking spray.

2) Cut butter into tablespoon size pieces and combine with the chocolate chips in a heat proof bowl.  Melt the chocolate and the butter together over a pan of barely simmering water.  Alternatively you can do this in the microwave on a medium setting for about 15 seconds, stir, then another 15 seconds.  Repeated until completely melted.

3) Allow to cool slightly and mix in the eggs, sugar, cocoa powder, vanilla extract, and salt.  **Note if your eggs are not room temperature they can cause the chocolate to seize.  If they are still cold then beat them quickly with the sugar to bring them up in temperature.

4) Add in the flour and baking powder and stir to combine.  Fold in the nuts.

5) Pour the mixture into the 9-inch (or 8-inch) square baking pan and bake at 350 for 30-40 minutes or until a toothpick comes out with just a few crumbs.

6) Allow to cool, sprinkle with powdered sugar and bust out your camera... 5 hours later it will be brownie time! Or just eat them now, who cares about pictures... you can always make them again! ;)

Anyone have any good food photography tips?  Let me know! I am always looking for more input.

Thursday, March 22, 2012

Homemade Nutella

What is better than sweet, chocolaty, hazelnutty Nutella?  I love this stuff.  It goes perfect on everything.  From bread to ice cream to coffee this stuff is like a great pair of black high-heels it matches whatever you pair it with!  With all the brioche and croissants this house has seen over the last few weeks it was time to make something to spice things up.


I was watching Food Network a few weeks ago and watched Giada make this amazing spread in her kitchen with nothing more than a food processor and a spatula.  I thought to myself... I have a food processor... I have a spatula... why don't I have homemade Nutella?!  So I went out and bought the ingredients and literally 5 minutes later I had an entire jar of this completely addictive and utterly scrumptious spread!


Now all I have to do is think of things to spread it on.  Oh who am I kidding... what shouldn't this be spread on?  So far I have undeniably determined it goes well on brioche, croissants, bananas, apples, in coffee, on crackers, mixed into icing, mixed into cake, on english muffins, and swirled it into ice cream. I'm going to go out on a limb and be really honest here... at one point when no one was looking I just ate it straight out of the jar spread on nothing at all!

Love Nutella?  This recipe and 4 others were featured by the Huffington Post's Kitchen Daily.  Check out mine and the four others and vote for your favorite:  http://www.huffingtonpost.com/2012/05/18/nutella-recipes_n_1525440.html?ref=kitchendaily


Homemade Nutella Recipe


Ingredients
yields about 1 1/2 cups of spread
2/3 cup hazelnuts
2/3 cup sweetened condensed milk
2 T. honey
1/2 t. salt
1/8 t. cinnamon
2/3 cup chocolate chips, melted

Directions
1) Place hazelnuts, sweetened condensed milk, honey, salt, and cinnamon in a food processor.  Blend together until completely combined and the spread becomes smooth.  This should take 2-3 minutes.  Stop and scrap down the bowl and blend another 15 seconds.

2) Melt chocolate chips and with the food processor running pour into the spread until completely incorporated.

This can be stored in a jar in the refrigerator and lasts for weeks.  Though if you have any of it left after a few days shoot me and email - I'll come and take care of it for you ;)

Tuesday, March 20, 2012

Pecan Shortbread

I love the weather.  Seriously, I love it.  I think it's delicious, I want to eat it.  But that's weird.  So instead with the weather perfectly warm and sunny I will celebrate by sitting on the balcony with a glass of warm tea and some nice crumbly, buttery, sugary cookies.  While I have never been a huge shortbread cookie fan they are a favorite of my mom and sometimes when I miss her living near by I make some and call her and pretend she is still someone I can visit for an afternoon tea!


I wanted to make some shortbread but needed it to have a little more flavor than the typical butter and sugar which can quickly bore me.  So taking some inspiration from Pecan Sandies - a childhood cookie I loved to share with my mom - I added some pecans and some brown sugar among other things.  

These cookies are great but you need to refrigerate the dough before baking so you can slice it.  Be sure to keep in mind this extra step in your prep time so you aren't left impatiently waiting for your cookies to chill (though let's be honest... any time you're waiting for cookies you're impatient... even if you knew you would have to wait... maybe lick the mixer!).

Ingredients
yields about 2 dozen cookies
3 sticks unsalted butter, room temperature
3/4 cup sugar
1/4 cup packed brown sugar
1 t. vanilla extract
1 egg 
3 1/2 cups all-purpose flour
3/4 t. salt
1/2 t. baking powder
1/2 cup crushed pecans

Directions
1) In a bowl mix together the butter and sugar until just combined.  Add the vanilla extract and egg and mix.

2) Add the flour, salt, and baking powder and mix on a low speed until the dough comes together.    Fold in the pecans.  Turn the dough out on a floured surface and shape into a long log.  Wrap the dough in plastic wrap and place in the refrigerator for at least 30 minutes but up to 5 days.

3) Remove dough from refrigerator and pre-heat oven to 350 degrees.

4) Slice the dough into 1/2 inch slices.  And place on a baking sheet.  Bake for 15-20 minutes or until the edges have just begun to brown.  Allow cookies to cool and serve with some nice warm tea then call your mom and tell her hi.  She probably misses you ;)

Tuesday, March 13, 2012

Puff Pastry

My it's been an embarrassingly long time since my last post!  I have no excuse... just that I have been relaxing a bit more lately.  Last week Nick and I went to Florida to celebrate Nick's Grandpa's 80th birthday.  We had an expertly planned surprise party followed by a perfectly executed dinner party followed by some fantastic family time spent lazing by the pool and carefree paddle-boarding in the Gulf.  Not too shabby... not too shabby at all.  But back to reality for this girl!
This post is a bit past due as it has now been weeks (yes that's plural!) since I made this.  Don't worry though - my current haphazard posting makes it no less droolworthy.  In class a few weeks ago we made our very own puff pastry.  Yes, that stuff you usually buy in the freezer section at the grocery.  That's right, I personally made my very own.  And let me be the first to tell you it is definitely worth the time investment!  This particular puff pastry I made into one of my favorite treats... palmiers!

Palmiers are French treats made from puff pastry that has been rolled in sugar and then baked.  They are crispy, buttery, and sweet.  Rolling them in sugar before baking them allows the sugar to slightly caramelize for the perfect flavor and crunch.

The puff pastry is the fun part of the recipe, turning it into palmiers takes a mere few minutes but the puff can be a half day affair.  Puff pastry is made from two layers, one of butter, one of flour.  You wrap the butter layer with the flour layer and roll the dough out and begin to fold it over itself.  Each time you fold the dough you create additional layers of dough, butter, dough.

Ingredients
yields on batch large sheet of puff pastry good for about 30-40 palmiers
Butter Block (or Beurrage)
1 lbs butter
3/4 cup all-purpose flour


Flour Block (or Détrempe)
3 cups all-purpose flour
1 t. salt
2 T. shortening
1 cup very cold water

Directions
1) Cut the cold butter into 1-inch cubes and place in a mixing bowl of a stand mixer with the paddle attachment.  Add in the 4 oz of flour and mix until no visible chunks of butter remain.  Be careful not to over mix the butter as you want it to remain cold throughout this process.

2) Form the butter into a large rectangle on a piece of parchment paper or a silicone baking mat and place in the refrigerator while you make the flour block.

3) Place the flour, salt, and shortening in the mixer with the paddle attachment.  Mix together slowly adding the water until it just starts to come together.

4) After the dough is just combined turn it out on a lightly floured surface and gently press together.  Do not knead the dough.  Rather just press it together much like you would for a pie crust.  You do not want to activate the gluten here or you will end up with chewy puff.

5) When the dough is combined use a knife to cut a cross-hatch into it, cover it with plastic wrap, and allow it to rest on the counter for 10-15 minutes.

Double Turn Completed
6) After the dough has rested take the butter out of the refrigerator and set aside.  Roll out the dough into a long rectangle that is about 1 inch wider than the butter block and about twice the length.

7) Place the butter block onto the flour block and fold the flour block over to wrap the butter block like the most delicious present anyone has ever wrapped.

8) Gently, ever so gently, roll the dough with the butter in the middle out to again create a long rectangle (flouring the surface helps reduce sticking).  This will begin your first "turn".  There are two types of turns you can do: a double turn or a single turn.**  You should start with a single turn, refrigerate the dough for an hour, then do a double turn and refrigerate the dough for an hour.  Then repeat that entire process (one more single, refrigerate, one more double, refrigerate).  And ta-da... you have puff pastry!!

Single Turn Completed
**Notes on Turns**
Single Turn: To accomplish this turn you fold the dough like an old school letter, into thirds, one piece on top of the other (see graphic).

Double Turn: To accomplish this turn you fold the each side of the dough over to meet in the middle.  Then fold the one side of the dough over to meet the other side (see graphic).

9) Allow your newly created puff pastry to rest in the refrigerator for an hour or up to 3 days.  You can also freeze the puff for up to 6 months.

For Palmiers
Ingredients
1 sheet puff pastry, all turns completed, thawed
3/4 cup sugar

Folded up to make the palmiers
Directions
1) Preheat the oven to 400 degrees.

2) Remove puff pastry from refrigerator and and roll out into a large rectangle using sugar on both sides instead of flour.  When you have a large rectangle (rolling the dough to about 1/8 - 1/4 inch thick) fold each side of the dough toward the center in thirds and finally on top of itself.

3) Cut the dough much like you would cinnamon rolls and dip each end into a bowl of sugar to add sweetness.  Then place on a greased cookie sheet with about 2 inches on either side to allow it to puff!

4) Bake at 400 for about 8-10 minutes or until it has puffed and begun to brown.  Remove from oven and turn each cookie over so the other side by crisp.  Bake an additional 8-10 minutes.

5) Remove from oven and crunch away! :)